Needle Felting Bunny // Conejo de Fieltrado con Aguja

Scroll down for the English version.

Hace un tiempo, una amiga me regaló un montón de lana para hacer lo que en inglés se conoce como needle felting, o fieltrado con aguja (que suena súper mal). A grandes rasgos, consiste en esculpir figuras usando este tipo de lana y unas agujas especiales.

Por circunstancias que serán reveladas en su momento (chanchán), no he podido ponerme a experimentar este hobbie hasta justo ayer. No tengo todo lo necesario, puesto que tuve que usar la parte de esponja de un estropajo para apoyarme y seguramente las agujas que me compré sean bastante reguleras (y la lana no estaba muy peinada). Sin embargo, a pesar de que sé que tiene sus fallos, éste fue mi primer intento con el needle felting.

(Sí, los ojos son Photoshop, pero es que todavía no tengo ojos que ponerle, los acabo de encargar por eBay.)

Felted BunnySome time ago, a friend gave me a bunch of wool for needle felting. In broad terms, needle felting consists of sculpting figures using this kind of wool and some special needles.

Due to some circumstances which will be revealed in due course (suspense music), I haven’t had free time to sit down and experiment till yesterday. I guess I haven’t got all the proper equipment though, since I had to use the sponge bit of a scourer to rest the piece while pricking it and I bet my needles aren’t precisely the best (plus the wool wasn’t as combed). However, even though I know it’s got some mistakes, this was my first attempt at needle felting.

(Yep, it’s got Photoshop eyes, but I still haven’t got toy eyes – I just ordered them from eBay!)

Hedgehog planter // Maceta-erizo

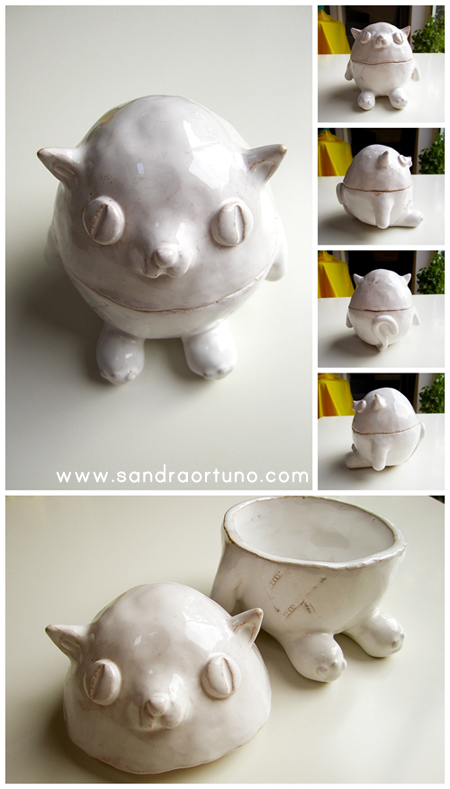
Ayer por fin pude recoger mi maceta-erizo de la clase de cerámica. Ha sido un proceso largo, puesto que, si vas a poner en marcha un horno que se calienta hasta 2000ºC, quieres asegurarte de que aprovechas al máximo la energía llenándolo todo lo que se pueda. Lo modelé con arcilla rakú y, antes de la primera cocción, pinté los ojos y nariz con engobe blanco y negro, respectivamente. Tras la cocción biscuit, lo bañé en esmalte transparente y, finalmente, se horneó a unos 1200ºC convitiéndolo en stoneware.

Yesterday I could finally pick up my hedgehog planter from the pottery class. It’s been a long process because, when you’re going to turn on a kiln that can reach 2,000ºC, you want to make sure you make the most of the energy you’re going to use by filling it up as much as possible. I modelled it in raku clay and, before the bisque firing, I painted its eyes and nose with white and black slip, respectively. After the bisque firing, I dipped it in transparent glaze and, finally, it was fired at around 1,200ºC turning it into stoneware.

Hedgehog planter

Ahora sólo necesita un poco de tierra y unas cuantas “púas” verdes.

Now it just needs a little bit of compost and some green “spikes”.

Comedero para pájaros de cerámica // Stoneware bird feeder

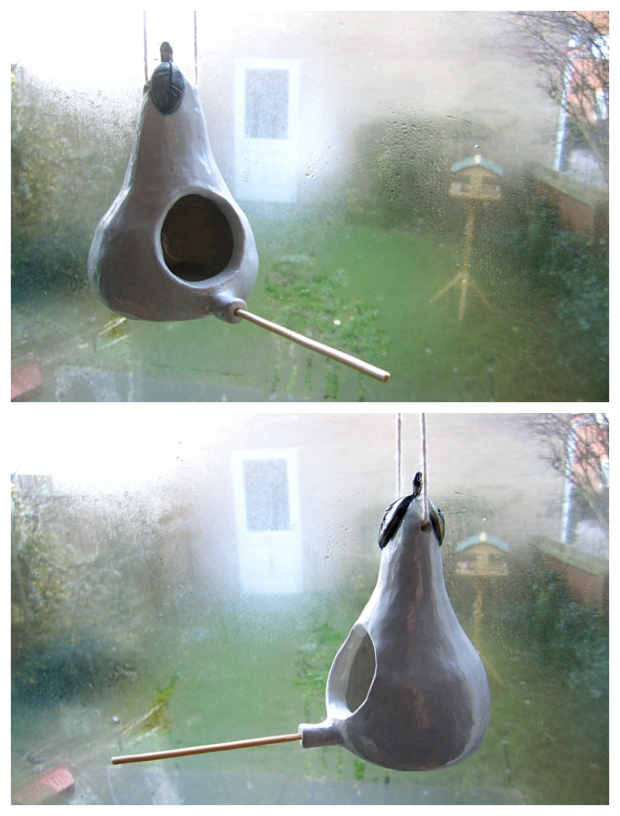
Este año la clase de cerámica está dando más frutos que el anterior y estoy bastante contenta con lo que está saliendo… de momento. Esto es un comedero para pájaros hecho con arcilla rakú, bañado en esmalte blanco con detalles pintados con óxido.
 
The pottery class is bearing more fruits this year and I’m quite happy with what I’m making… for now. This is a stoneware bird feeder made with raku clay, dipped in white glaze, with a couple of details painted with oxide.
 
Ceramic Bird Feeder

Técnica decorativa para cerámica // Decorating pottery technique

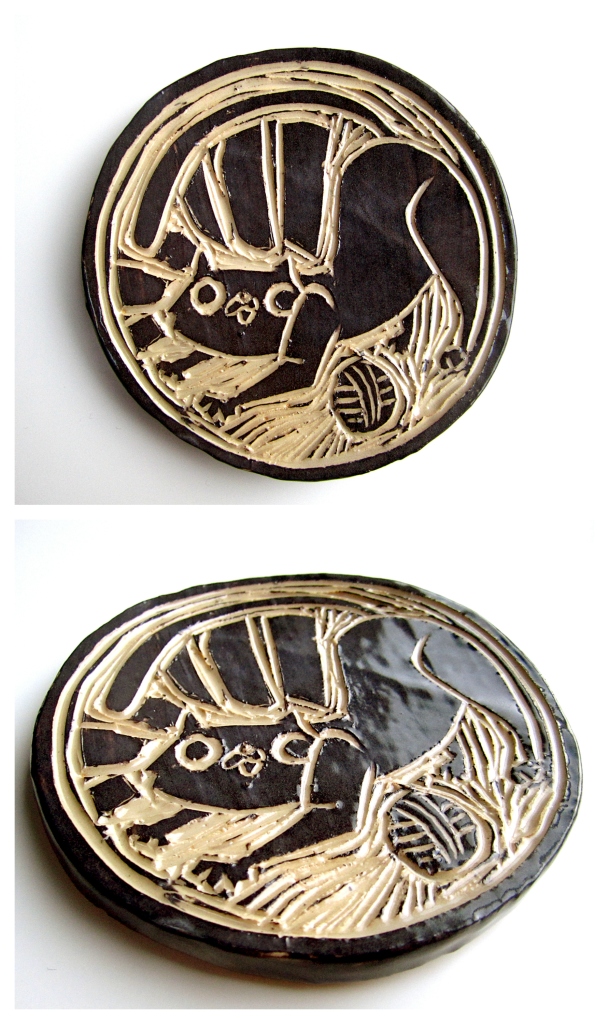
El otro día también pude recoger de clase de cerámica un azulejo que hice simplemente para probar una técnica decorativa.
 
Ésta consiste en pintar completamente la pieza cuando todavía está húmeda con engobe de color y, tras esperar a que seque muy ligeramente, usar una gubia para crear el diseño como si estuviéramos preparando una plancha de linóleo para grabado. Supongo que podríamos decir que es una especie de técnica de esgrafiado. Después de la primera cocción, se baña en esmalte transparente, se vuelve a cocer et voilà! Yo creo que el resultado es bien majo, ¿no?
 
Ahora estoy preparando un plato grande que decorar de la misma manera. Espero tenerlo listo prontito.
Sgraffito Tile
Last week in pottery class, I finally finished a tile that I made just to test a decorating technique.
 
The thing is, you paint the piece completely with decorating pottery slip while it’s still wet and, after waiting for it to dry just a bit, you take a gouge and create the design just as if you were preparing a linoleum sheet for engraving. I guess we could say it’s a kind of scraffito technique. After the biscuit firing, you dip it in clear glaze, stoneware-fire it et voilà! I reckon the result is quite attractive, isn’t it?
 
I’m currently modelling a big plate which I’ll decorate in the same way. I hope I have it finished soon.

Gato de cerámica // Cat pot

Tras un verano sin parar quieta (visitas, barbacoas, viajes de Luna de Miel a Islandia…) ¡he vuelto! Y lo primero que quiero enseñar es uno de mis primeros resultados del curso de cerámica para adultos que llevo haciendo ya unos meses en Impington Village College.
 
Sinceramente, no me gusta cómo ha quedado el esmalte. De hecho, mi idea inicial era dejarlo mayormente blanco y después pintar sobre él pequeños detalles de color. Visto lo visto, creo que lo dejaré como está, no sea que lo termine de fastidiar.
 
En fin, así es la cerámica para principiantes: sorprendente y decepcionante a partes iguales.
Earthenware Cat
After a non-stop summer – visits, BBQs, Honeymoons in Iceland… – I’m back! And the first thing I wanna show is one of the first results of the pottery course for adults I’ve been attending for some months now at Impington Village College.
 
To be honest, I don’t like how the glaze turned out. In fact, my initial idea was to leave it mostly white and then add some small colour details with enamel paint or something similar.  However, given what I’ve got, I guess I’ll leave it as it is just in case I spoil it any further.
 
Anyway, this is the way pottery is for beginners: both surprising and disappointing in equal parts.